Monday, February 25, 2013

Quilt Inspiration

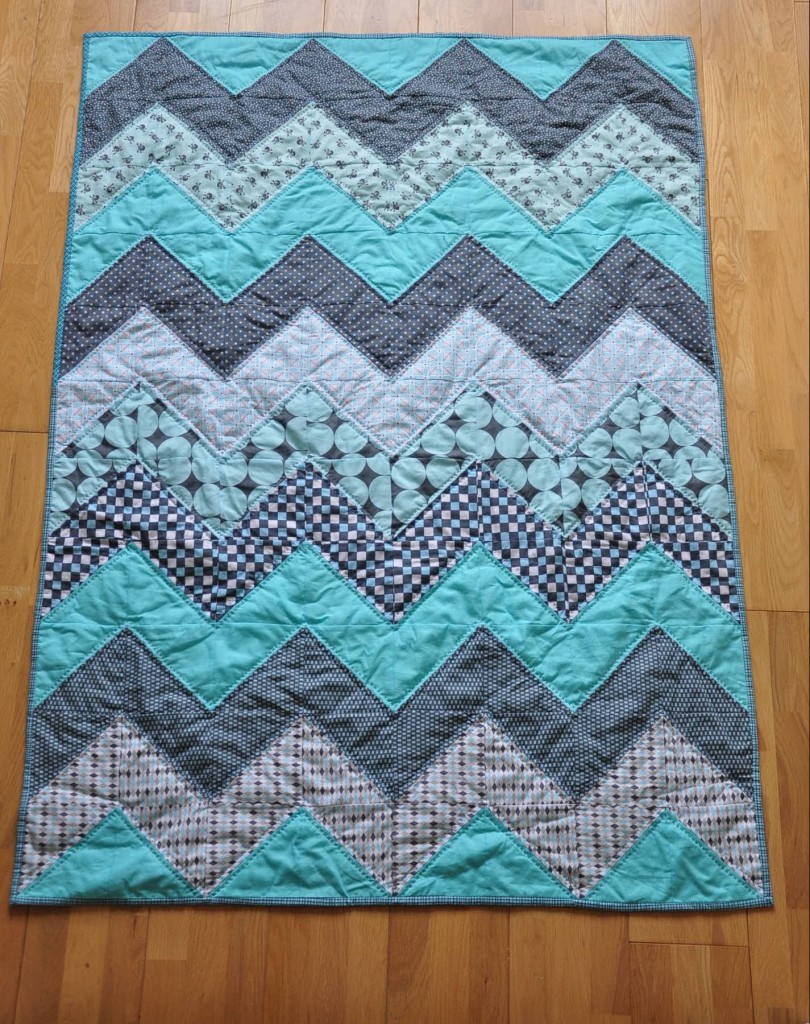
As a crafty person, one of the things I really want to do is make a quilt.  Now, I've made a few baby quilts but they were just piecing together a few squares and then quilting around the edge of each square to attach all three layers.  It was a great way to start but now I want to try my hand at something more intricate and cool.  There are two quilt projects I want to work on.  Project A is a quilt for our living room.  Something I can just throw over the back of the couch for added color and decoration but still functional at night.  Project B is two twin size quilts for the boys new room.  The new room is still in the planning stages so I want to get started on the living room quilt first.

I have been scouring Pinterest for quilt inspiration.  I wasn't quite sure what I wanted to do but knew I didn't want just a bunch of squares.  Then I came across a chevron quilt and knew that was it!!  I have the fabric I want to use and know that after coming across all the cool ideas, this will be just my first one!  Here are the ones I found most inspiring, starting with the one with the tutorial I'll be using.

Source

Source

Source

I am super excited about getting started!  I hope it turns out as awesome as these quilts.  I'm using patterns for this one but the next one will be solids.  There are no limits to what combinations you do!


post signature

Wednesday, February 20, 2013

Strawberry Cream Pie

Blog hops are great because not only do you get to bring people to you and show off what you've done, but you also find great things done by others.  This recipe is a prime example.  GASP!  I didn't get a recipe from Pinterest!  Hard to believe, I know.  I was excited to come across this recipe too.  I wanted to make something yummy for Valentine's day and this was perfect.  Little did I know this recipe would have me going to three different grocery stores for strawberries.  I was determined to make it though!

The Unsophisticated Kitchen created the recipe for this Strawberry Cream Pie.  I was hoping it tasted as good as it looked.


The reviews from the crowd:  FABULOUS!!!  It was divine!  My hubs was asking when I was going to make it again before he even finished the last piece!  That, my friends, is a successful recipe!

I think the best part of this recipe was the surprise chocolate covered crust.  You must head over to The Unsophisticated Kitchen and try it out for yourself!


post signature

Tuesday, February 19, 2013

Taking Down a Builder's Mirror

{Before I get to the fun stuff, I need to send a special shout out to all the working moms out there.  I normally only venture out of the house into the workforce on Fridays.  However, I've been filling in this week and last.  Oy vey!!  It is kicking my butt.  I feel as if my house isn't functioning efficiently, despite my husband helping as much as he has.  There isn't enough time in the day to do everything (there isn't even when I'm home 6 days a week) and I've only doing half days.  That's why I haven't filled you in on the fun stuff I've been working on.  My point, whether you are a mom that works from home or a mom that leaves the house for work, YOU ROCK!!!}

Now, on to the show.

Does your home have any builder's grade mirrors??  Every bathroom in our house has one.  People are getting smart, though, and framing those mirrors to add character to them.  I'd love to do that in our master bathroom. Add that to the long list of things to do around the house to spruce it up.  The mirror in our half bath is a different story.  It is not a standard rectangle mirror.  It is an arch.  You can't easily frame an arch.  There wasn't anything WRONG with it, but there was just no character to it.  That means it had to go.

The first thing I figured out was that the mirror was glued to the wall.  Gee thanks mister builder, make this super hard on me.  I looked online for how to get it down and asked around.  I got the same general answer.

Step 1:  Tape off the mirror
Step 2:  Take a metal putty knife & rubber mallet around the edge to loosen the glue.
Step 3:  Pull and hope it doesn't shatter

YIKES!!

I called over my friend Jessica for some help and we tried these steps.  It didn't work. Step 2 didn't get us any where. It was clear immediately that all of the glue was in the middle of the mirror.  The wall that the mirror is on is very narrow and there is little to no clearance to access underneath the mirror from the sides.

This is the half bath in all it's glory.  I did not edit this picture so you can see how there is no light in the room and why I needed to paint the walls.  This color is awful.  It puts off an orange glow that just needed to go!


It was time to get creative.  I went on a search for a piece of thin flat metal that I could slide behind the mirror.  You'll never guess what I used.  A metal piece that you put over the joint where two floors meet.  It was long & flat and happened to be the only thing we owned that was long and flat.  It was the only thing that fit behind the mirror.  We probably looked like crazy girls, but here's what we did:


I stood on a step ladder in front of the mirror.  Jessica stood behind me with her hands braced up against the mirror.  I took the metal floor joint and slide it down behind the mirror.  I beat on it with the rubber mallet.  I'd take it out and put it behind the mirror again in a different spot.  Once we got the hang of what we were doing, it really only took about 5 minutes.  The problem was that it took over an hour to find the right piece of metal that fit behind the mirror.  Oh well.  It worked!!  The mirror was off and in one piece.  No one got hurt either :) Man oh man was that some nasty black glue holding it on.


That's what it looked like after the mirror was gone.  Thankfully after some sanding and patching, it wasn't a big mess.  I put up a new mirror after painting and you can't even see any blemishes.  These pictures even give you a sneak peak of the new bathroom color.  The painting is finished and the new mirror is up but the bathroom isn't completely finished.  After a trip to Ikea next weekend, I'll be able to unveil the new space.  It's coming together so nicely :)

That's how you take down a builder's grade mirror.  If you try it, hope it comes down as easily!


post signature

Tuesday, February 12, 2013

Let's Get Organized, Organized

Let's get organized, organized. I wanna get organized. Let's get into organized. Wait! That's not how Olivia Newton John sings it. That's how it is in my head though.

I want to let you in on a little secret. My life is full of clutter. Oh, that's not a secret? What tipped you off? Could it be the fact I live with two preschool boys? Yup! I organize. I try to teach them everything has a place. Ultimately, though, in a day my house is back to messy. Here's an example of what my basement looks like right this second. (yes I'm blogging instead of cleaning)


Even when they help me clean it still ends up looking like this when they're given play time. I've had enough. ENOUGH! I've pinned plenty of organizational tips and spent some time looking through them today. It's time to declutter my house! In the process it will get organized. I've managed to go through my drawers and closet today pulling out clothes I know for sure need to be removed. Tonight during evening clean up, I got out some clear bins I got from the dollar store and organized some toys. I threw away things that needed to go and set aside things that will go to my nephew. There are two storage areas in my house full of stuff waiting for a yard sale. I'm psyched for yard sale season. The hubs and I have an Ikea trip planned to get some furniture/organizational items for our basement.

Here's what I know. You have to purge, purge, purge. Why keep things you don't need or use? Don't keep things for the what if's. If it doesn't have an intended purpose, get rid of it! This is something I'm in the process of implementing in my house. It feels good to see space opening up as things I don't need are being removed. It gives me motivation to keep going. I'm looking at this like a home decor project, which excites me.

Here's what I started in our living room today.


Batman and other superheroes in one container. Cars and other action figures in one container. Legos in a smaller container. The boys can see what's inside and won't need to dump them all out since they can easily see them all. Why didn't I do this sooner?

Here's a very small portion of the books we have.


I've pulled out board books that they don't need. Now I need to go through and remove the books that are more for older kids who can fully read on their own and store them away for now. Just doing a little at a time might take a lot longer but I'll see progress. If I wait until I have a whole lot of time or a full day to work on it, it'll never get to it. I'll keep you updated to hold myself accountable. Happy organizing!!

Monday, February 11, 2013

Let's Try Something Chocolate

The best part about the Super Bowl is the food.  People come to us because of the boys so I always like to make a great selection of snacks.  Knowing we'd have plenty of awesome tasting bad for you food, I wanted to have a slightly healthier dessert spread.  Wait a minute, a healthy dessert?  Yup.  What did I do?  You know that answer!  I went straight to Pinterest.  I picked out two recipes and here's what the food panel said.

Chocolate Cheesecake Cupcakes
Culinary Tuesdays has a great recipe for these cupcakes.  You use greek yogurt when making the batter rather than eggs and oil.  That makes it a healthier dessert option.

 Let me tell you, Culinary Tuesdays got this recipe right!!  These were delicious.  The cheesecake part of the cupcake made it great without icing.  I had a can of cream cheese frosting in the pantry and got that out for people to use if they desired.  Turns out, the frosting gives the cupcakes a completely different flavor which was still awesome!!!  Across the board, these were loved by all.  Score!


Healthy Chocolate Brownie Cookies
This recipe came from Eliza's Edibles.  It's healthy because you get protein from pureed black beans.  Sound gross?  You couldn't taste them one bit.  Did I like the cookie?  The cookie was good, but I didn't like it.  That clear as mud?  It was very rich but it was a bitter dark chocolate flavor.  I'm not a fan of dark chocolate.  If I was a lover of dark chocolate, these cookies would be on my list of recipes to repeat.

If you try them out, let me know how you like them!

post signature

Thursday, February 7, 2013

Hair

When it comes to my hair, I'm a chicken.  There are tons of styles out there that are super cute but I'm too afraid to try them on myself. On top of that, I'm super picky.  So instead of trying something new and fun and risk not liking it, I settle for super boring.  I chopped my hair off when the boys were about 3 months old.  It's been growing out ever since with a maybe 2-3 trims in there some where.  Long and stringy it had become.  BLAH!  I have been pinning hair styles in preparation for getting it cut.  I knew since my sister (who normally cuts my hair) was going to be out of commission for a while with my new nephew I would get to need to go to a salon.  Here are the two I liked the best.

Reese Witherspoon
You can't go wrong with Reece!!  BUT I feared the bangs


hair cut
Ashley Greene's hair is beautiful in this picture.  The layers are long enough and the color is pretty.  She won out.  I sent this picture to my hairdresser cousin and she was game.  YAY!  Time for a change.  

Long & limp

In progress

The After

She took off about 4 inches.  It feels like my hair is gone, but it's nice not dealing with so much.  She did a great job.  Looks about as close to Ashley Greene as I'm ever going to get.  We even decided to go with some caramel highlights which is so different than anything I've done in a very long time.  I was overdue for a change and change is exactly what I got.  I love it!!  Thanks Chas!!


post signature

Wednesday, February 6, 2013

Changing Up the China Cabinet

The two major projects I have going on right now are my dining room and half bath.  My half bath is on hold until I can get to IKEA.  My dining room is in progress.  I can see it from the two rooms I spend the majority of my time in, the kitchen and living room.  It's a big room with green walls, a dining table, buffet and china cabinet.  There is a small random white mirror on the wall above the buffet and nothing on the opposite wall where the china cabinet is.  It just feels so unfinished and cold.  I've lacked inspiration to complete the space for the last two years.  All it took was new curtains and some time on Pinterest & Houzz.com to fill me up with inspiration.

My biggest hang up with the dining room is my china cabinet.  Let me first say that I love my china cabinet.  I love how the design is traditional but the high gloss white paint and the fabric in the back are modern.  I love mixing those elements.  Here's a reminder of my first furniture renovation.


The thing that bugs me is the fabric in the back clashes horribly with the wall color.  You can see just how much in the pictures.  Even though the wall color was one of the colors in the fabric, it just doesn't go.  Last week I had enough of the clashing.  I ripped out the fabric.  It was cheaper and less hassle (and argument from the husband) than painting the whole room.  I thought I would be sad that my first baby was no more, but it instantly made me happy.  After discussing some options with my dad, I decided to paint the backing.  The best part about that option was the price tag: FREE!  I had a sample of Olypmic's Earl Gray paint left over and it worked perfectly!!  It makes me excited when projects work, especially those on the fly.  The neutral color makes it feel warm and it still feels like a good mix of traditional and modern.


After we rearrange the furniture, I'll get to add my new china to the cabinet.  Well, it was just handed down to me by my grandma but it's new to me!  With each item, I get excited to be one step closer to a finished room!
post signature

Tuesday, February 5, 2013

Yes, I Made That Bench!!

There's something to be said for the pride you have when you complete something.  Anything.  That sense of accomplishment is such a great feeling!  I get it for many things but last night it was for finishing a project I started about 6 months ago.  From 8-12 with several glitches and a snack break, I worked on...


Here's how it went down.

I saw this picture on Pinterest:
Easy DIY- a piece of wood- 4 legs (all of which are sold at home depot for around $5)- padding ( or an old old comforter or 2) and then staple pretty fabric :)
It takes you to a tutorial on The Muddle Huddle.  It's a super easy tutorial that I knew I could pull off without any help.  I headed to Home Depot for the supplies I didn't have on hand.

To do this project, I needed:
A board -size of your choice (Mother Huddle used left over shelf but I did not have one of those)
Spindles for legs
Connector to attach legs to board (H.D calls it a heavy duty top plate - triangle shape)
Foam
Fabric
Scissors
Hot Glue
Staple Gun/Staples
Drill

I got right to painting the board and spindles.  Then I put them in my art room and there they sat.  October.  November.  December.  January.  I'd see them laying on the floor and want to work on it but never got around to it.  The mood struck me just right last night and once I started I refused to stop.

1.  Cut your foam (or batting if that's what you're using) to fit the top of the board.
2.  Hot glue the foam or batting to the board.
3.  With fabric face down, lay the foam side down on top of the fabric.  Cut the fabric leaving about 2-3 inches of extra fabric to pull tightly.  
4.  Staple the fabric in place, pulling tightly.
5.  Take your triangle top plate and put in each corner.  Take a crayon (that's just what writing utensil I had accessible to me) or pencil and mark inside each hole in the plate.  
6.  Take drill and make small hole in each crayon mark
7.  Add screws in the holes of top plate (should line up with your drill holes)
8.  Turn over and sit on :)

It's a very simple idea.  As long as your staple gun doesn't run out of staples and then get jammed requiring a 45 minute break while you fix it, putting it together shouldn't take you long.

I love it!!  The spindles give it a traditional look but with modern fabric.  I just need to get two baskets to put underneath for shoes and VIOLA!


Linking up to these great parties~
Vintage Gwen    733 Blog   Lil Luna   Someday Crafts   Pinkapotamus

post signature

Monday, February 4, 2013

Heeeeeeeere's Jeannie

(say that in your best Jack Nicholson voice!)

I'm back!! It's been too long!! Our hectic life is slowing down to normal which means I get to be creative again!!! That's exciting for me. I have several projects pending or in the works and I'm chomping at the bit to get to them! I have been bitten by the inspiration bug big time.

My dining room is a work in progress. I'm not overly fond of the color but I'm not painting it again. It went from orange to green but almost a 70's green. It's not a bad color, I'm just not a big fan. I learned the hard way not to match a room color to fabric. Last week I traded out my old curtains for new ones. Thanks to Target's shower curtain that i cut up, I have fresh, modern curtain panels that help change the feel of the room. After searching Pinterest and houzz.com I came up with a few more ideas to complete the room.

One of the ideas I have for our dining room is to add more seating. We are always two chairs short when we have guests so I went on a hunt. I wanted to find some matching captains chairs that I could paint and reupholster and wouldn't break the bank. I found just that at our local peddlers mall on Thursday. They were sturdy and clean and only $20 a piece. I hesitated, though, and walked out without them. I kept thinking about them and decided before things got crazy for Super Bowl to go back for a second look.  It was meant to be because not only were they still there but they had been marked down to only $12 a piece. I took them with me this time. While the boys were at school today I ran to Hobby Lobby and got the fabric for them. Thursday it's supposed to get up to 50 and I plan to prime them(after getting my hair done which I'm super excited about). Hopefully by next weekend they'll be finished!


In the midst of the after Christmas craziness, my nephew was born. He is such a little sweetie and I just love him to pieces!!! How can you not love that face??


Lots of exciting things going on around here and I'm loving it :)